
Germination Test
Before you trust a season to a sack of seed, spend ten minutes on it. A germination test costs nothing and tells you exactly how much to raise your seed rate — or whether to buy a fresh lot instead.
- Free — No Lab Needed
- 10 Minutes to Set Up
- Result in 5–8 Days
- Works for Every Field Crop
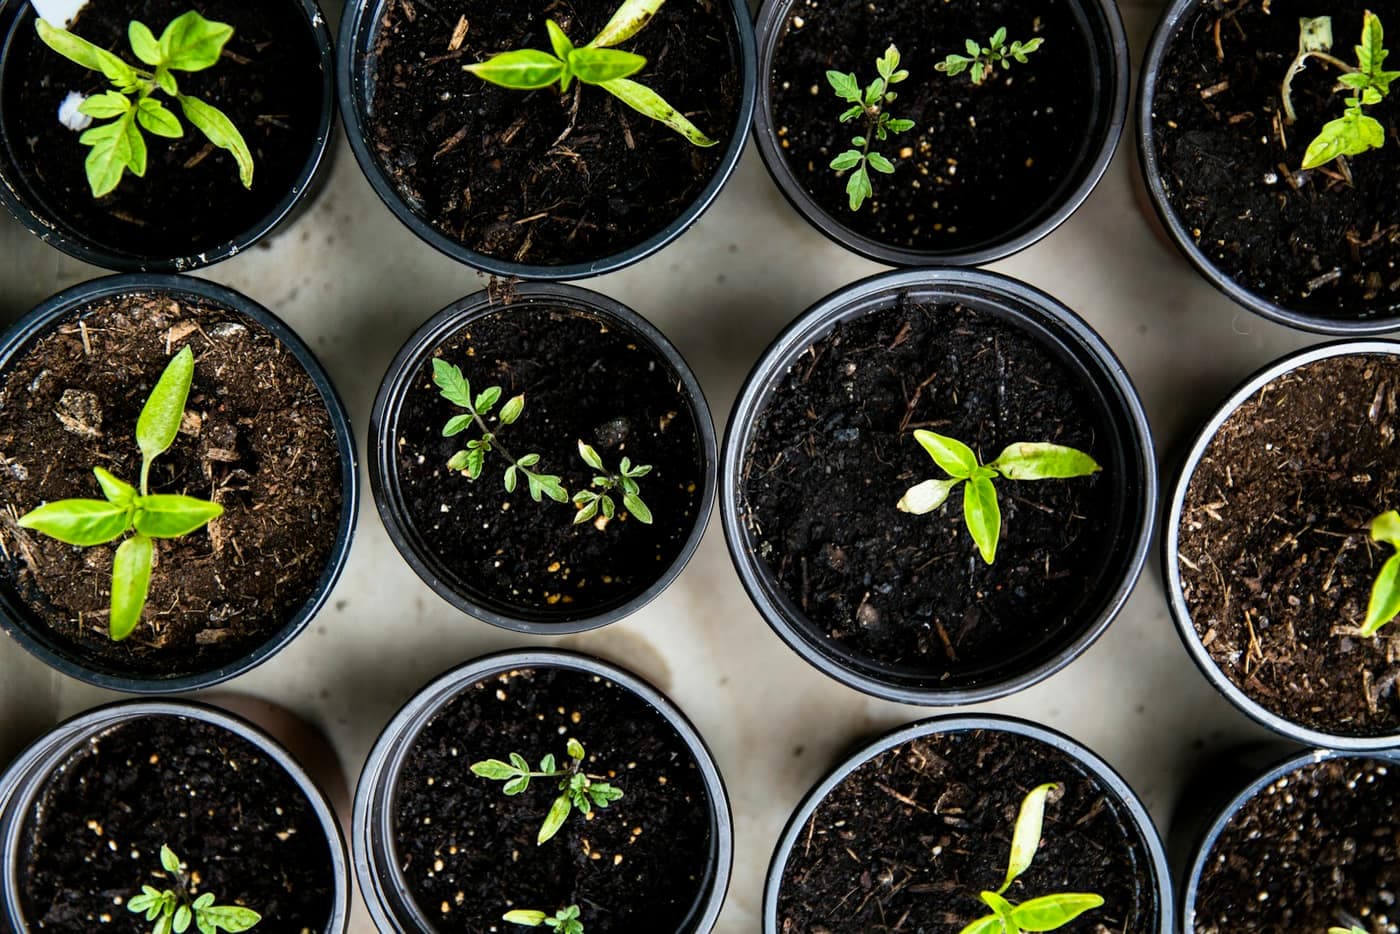
Every season, seed that was never tested gets sown at the book rate anyway — saved seed from last year, a bag that sat in a hot store room, a lot bought cheap from a neighbour. The gap in the plant stand it leaves behind does not show up as an obvious mistake; it shows up three weeks later as a thinner field that fertiliser and irrigation cannot fix, because the shortfall was decided on sowing day, not afterwards.
A germination test closes that gap for the cost of a wet cloth and ten days of patience. Everything below is built to answer the question standing over the sack: how many of these seeds are actually alive, and what should that change about how you sow them — the method, the calculator, the crop-wise numbers, and what a result under 85% should mean for your seed rate.
Germination test at a glance
The numbers to know before you start the test.
- Sample Size
- 100 seeds (or 4 sets of 25)
- Moisture
- Damp throughout — never waterlogged
- Temperature
- 20–30°C for most field crops
- Result In
- 5–8 days for most crops
- Certified-Seed Standard
- ≥ 85% for most cereals
- Cost
- ₹0 — cloth or paper you already own
Germination % and seed rate calculator
Enter how many seeds you tested and how many actually germinated — get the percentage, a verdict, and the multiplier to apply to your book seed rate.
Your seed lot
Method
Count the seeds onto a moist cloth or rolled paper towel, keep it warm and consistently moist, and count how many have germinated after 7–8 days for most field crops. A viability (tetrazolium) test reads faster but needs a lab — this same percentage and verdict apply either way.
Enter how many seeds you tested to see the result.
The paper towel method, step by step
Seven steps from a handful of seed to a reliable germination percentage — no lab required.
1. Draw a representative sample
Take seed from several handfuls across the bag or heap — top, middle and bottom — rather than from one spot, so the sample actually reflects the whole lot.
Mix the pooled sample well before counting seed out of it.
2. Count out 100 seeds
If the lot is small or precious, count out four sets of 25 instead and average the four results — nearly as reliable as one set of 100, and easier to count without losing track.
Take seed as it comes. Do not quietly skip the shrivelled or discoloured ones — that is what the test is for.
3. Prepare the moist bed
Wet a cloth or paper towel and wring it until it is damp, not dripping. Lay it flat and space the seeds out in rows so no two touch — crowding lets one rotting seed spread to its neighbours.
4. Roll or fold, and label
Roll the cloth loosely from one end (the "rag-doll" method) or fold blotter paper over the seed, and write the date and lot on the outside — essential the moment you are testing more than one bag.
5. Keep it warm and consistently moist
Place the roll in a closed plastic box or bag, out of direct sun, somewhere that holds 20–30°C. Check daily and re-moisten the moment it starts to feel dry at the edges.
A closed container keeps humidity steady without letting the cloth turn waterlogged the way an open dish can.
6. Start counting from day 4
A seed counts as germinated once it has a clear root (radicle) at least as long as the seed itself. Begin daily counts a few days before your crop's usual final-count day so you do not miss the peak, and remove counted seed so it is not counted twice.
7. Final count, then calculate
On the crop's standard final-count day (see the by-crop table below), do the last count and run the two numbers through the calculator above. Note weak or deformed sprouts separately — they do not count toward a sowing decision even though they technically germinated.
A seed that only swells with water, or sprouts a root but never a shoot, is not a germinated seed.
What does your result mean?
Match your percentage to the band below before you decide how — or whether — to sow this lot.
85% and above
Matches the certified-seed standard for most field crops. Sow at the book seed rate for your crop — no correction needed.
Open the seed rate calculator70–84%
Usable, but below the certified standard. Scale your seed rate up in the same proportion the result falls short of 85% — the calculator above does this automatically.
Recalculate your seed rate50–69%
Marginal. Only worth sowing if no replacement lot is available — increase the seed rate substantially, treat the seed, and budget for gap-filling once the stand comes up.
Treat the seed before sowingBelow 50%
Do not sow this lot. Below half the seed is already dead — no seed-rate correction makes this economical. Buy a fresh certified or truthfully labelled lot instead.
Find a certified variety
Which test method should I use?
Paper towel is the default for most field crops — sand and soil trays suit specific situations better.
All three methods test the same thing — how many seeds out of a known sample produce a normal seedling — but they trade setup effort against how closely they simulate the field. Default to the paper towel method; move to a tray method for large seed, or when you suspect a soil-borne problem the cloth cannot show.
| Feature | Paper towel | Sand tray | Soil / pot tray |
|---|---|---|---|
| Best for | Cereals, pulses and oilseeds — most field crops | Larger seed — maize, groundnut, cotton | Vegetable seed and a closer field simulation |
| Equipment needed | A cloth or paper towel and a plate or box | A shallow tray and clean, disease-free river sand | Small pots or trays and ordinary field or potting soil |
| Setup time | 5–10 minutes | 15–20 minutes | 15–20 minutes |
| Result in | 5–8 days for most crops | 6–10 days | 7–12 days |
| Accuracy | High — the standard reference method | High, and closer to real field emergence | Good — the only method that shows soil-borne disease effects |
| Ease of counting | Easy — roots are visible directly on the cloth | Moderate — sift gently to check for roots | Harder — you must wait for the shoot to break the surface |
| Main downside | Will not show soil-borne disease or seedbed crusting | Needs clean sand, or the result reflects the sand, not the seed | Slowest, and pot-to-pot soil variation can skew results |
Standard germination by crop
Typical days-to-final-count and the certified-seed standard for major crops — read your result against these.
Troubleshooting a confusing test
When the test itself goes wrong before the seed has had a fair chance.
No seeds germinate at all
- Symptoms
- Zero, or almost zero, sprouts by day 7–8; seed looks unchanged, or has gone soft and mushy.
- Causes
- The lot is dead — age, heat damage or poor storage — or the cloth dried out completely at some point during the test.
- Solutions
- Re-run the test on a fresh sample, keeping the cloth reliably damp throughout. If the repeat also fails, the lot is dead — do not sow it.
Mould or a sour smell develops
- Symptoms
- White, grey or black fuzz on the seed or cloth by day 3–4, sometimes with a sour smell.
- Causes
- The cloth was waterlogged rather than damp, air circulation was poor, or the seed was already carrying a seed-borne fungus.
- Solutions
- Rinse and re-moisten the cloth to damp, not wet, for the retest — a fungicide-treated sample run alongside shows whether the fungus, not the seed, was the real problem.
Seeds swell but never sprout
- Symptoms
- Seed absorbs water and softens, but no root or shoot appears even after 10 or more days.
- Causes
- The seed was already dead before testing and only imbibed water passively, or the lot is well past its viable storage life.
- Solutions
- Count it as non-germinated in the final tally — it is not still "on its way", it has failed.
A root appears but never a shoot
- Symptoms
- A clear white root (radicle) emerges, but the shoot (plumule) never follows, even after several extra days.
- Causes
- Seed vigour is low even though the seed is technically alive, or the test spot is too cold for the shoot to push through.
- Solutions
- Give it two more days somewhere warmer before the final count. If the shoot still does not appear, count it as abnormal, not germinated.
Germination is very uneven
- Symptoms
- Some seeds sprout by day 3, others not until day 8, with a wide spread rather than a clear peak.
- Causes
- The sample mixed old and new seed, or moisture was uneven across the cloth — drier at the edges than the centre.
- Solutions
- Fold the cloth so every seed gets equal contact with moisture, and draw the retest sample from a well-mixed pool, not one handful.
The test looked fine, but the field stand was poor
- Symptoms
- A home test showed 80%+, but the actual number of plants that came up in the field was clearly lower.
- Causes
- A cloth test does not capture seedbed crusting, soil-borne disease, or a cold, wet field at sowing — those need vigour and field conditions, not just germination.
- Solutions
- Treat the seed before sowing and prepare a finer, better-drained seedbed — a good germination percentage is necessary but not sufficient on its own.
Common mistakes
Seven ways a germination test ends up giving a misleading answer.
Testing seed straight from cold storage
Seed brought directly from a cold or very dry store into a warm test can show artificially poor results — let it come to room temperature first.
Using heavily chlorinated tap water
Strongly chlorinated water can suppress germination in a home test that the same seed would pass in the field — use settled or filtered water where possible.
Counting too early, or only once
Stopping the count on day 4 or 5 for a crop that peaks later understates the true percentage — always count on the crop's standard final day, not whenever is convenient.
Testing one handful instead of a mixed sample
Seed settles and separates inside a sack — a sample taken from the top or one corner does not represent the whole lot.
Letting the cloth dry out even once
A single dry spell can stall or kill germination that would otherwise have succeeded, understating the result for reasons that have nothing to do with actual seed quality.
Skipping the seed-rate correction after a low result
A germination test only earns its ten minutes if the result changes what you do — running the test and sowing at the book rate anyway defeats the purpose.
Discarding the lot on a single low result
One rushed or badly set-up test can understate a perfectly good lot — a surprising result is worth repeating carefully once before writing off the seed.
Related calculators
The tools that sit either side of this one in the sowing decision.
- Seed Rate CalculatorConvert your germination result into the exact seed rate to sow, per acre or hectare.
- Seed Variety FinderIf this lot failed, find a certified variety suited to your crop, state and season.
- Seed Treatment GuideDosage, cost and mixing order for the fungicide or biological you treat this lot with before sowing.
- Crop CalendarTime your sowing window so a two-week retest, if one is needed, still fits before it closes.
The complete guide to germination testing
Why it matters, every method explained, how to read the result, and the mistakes to avoid — everything above, in reading order.
Why test germination before every sowing
Field trials attributed to ICAR and state agricultural university networks consistently point to seed quality — variety, germination and freedom from seed-borne disease — as one of the largest single levers behind the yield gap between an average farmer's field and a demonstration plot. Germination is the one part of that a farmer can check at home, for free, before a single rupee is spent on the season.
Certified seed already carries a germination figure on its tag, but that figure is a snapshot from the date it was tested — not a promise about today. Seed that sat through a hot summer in an ordinary store, or that you saved from your own last harvest, has had every chance to lose viability since. The only way to know its current germination is to test it yourself, close to your actual sowing date.
The paper towel method in detail
The paper towel — or "rag-doll" — method is the reference standard for most field crops because it is fast, cheap and lets you watch the root emerge directly against the cloth. The step-by-step method above covers the full procedure; the two details that decide whether it works are moisture and temperature, in that order.
Moisture has to stay damp, never dripping and never dry, for the entire test — a cloth that dries out even once can stall or kill germination that would otherwise have succeeded, and one that stays waterlogged invites mould before the seed gets a fair chance. A closed container that traps humidity without letting water pool at the bottom solves both problems at once.
Reading the result: percentage, vigour and abnormal seedlings
Germination percentage answers one question — how many seeds produced a normal seedling — and nothing more. A seed that only swells with water, or one that sprouts a root but never a shoot, is not counted as germinated even though something visibly happened to it; keep those in the failed pile.
What the percentage does not capture is vigour — how fast, how uniformly, and how well a seed lot emerges under a rougher seedbed or cooler soil. Two lots can test at the same 85% and still perform differently in the field; there is no simple home test for vigour, which is why buying fresh certified seed each season, not just a high germination percentage, is the more complete answer.
Correcting your seed rate for a low result
The book seed rate for any crop already assumes roughly 85% germination and reasonably good field conditions. Sow a lot that tests lower than that, at the same book rate, and the plant stand comes up short in direct proportion to the shortfall — not sooner, not later, exactly on sowing day.
The fix is simple: scale the seed rate up in the same proportion the result falls short of 85%, using the seed rate calculator rather than guessing a round-number top-up. Never scale the rate down for a lot that tests above 85% — the book rate already accounts for other field losses beyond the seed's own germination.
Choosing between paper towel, sand and soil tray methods
The method comparison above covers the trade-offs in full, but the short version is: default to paper towel for cereals, pulses and oilseeds; move to a sand tray for larger seed like maize or groundnut, where a cloth test is harder to read cleanly; and use a soil or pot tray when you specifically want to check whether a soil-borne problem, not the seed itself, is behind a poor field stand.
None of the three methods is more "correct" than the others in an absolute sense — they simply trade setup effort for how closely they simulate the field. A cloth test that shows 85% and a soil-tray test on the same lot that shows 75% are both telling the truth about different conditions; when they disagree, treat the soil-tray figure as the more field-realistic one.
When to stop trusting a lot and buy fresh seed
A result in the 70–84% band is still worth sowing with a corrected seed rate. Below 50%, the correction stops making economic sense — you would be paying for, handling and sowing roughly double the seed to get a normal stand, with no guarantee the surviving half performs any better than the number suggests.
At that point the honest answer is to find a certified or truthfully labelled variety rather than keep correcting for a lot that has already failed. Two to three weeks of lead time before your sowing window is usually enough to test, discover a problem, and still source a replacement lot — which is the whole reason to test early rather than the night before.
Frequently asked questions
How many seeds should I test?
100 seeds is the standard sample. If seed is scarce or expensive, testing 4 sets of 25 and averaging them is nearly as reliable and easier to count without losing track.
How long does a germination test take?
Most field crops give a reliable final count in 5–8 days; a few, like paddy or cotton, need up to 12–14 days — check the by-crop table above for your specific crop.
What actually counts as a germinated seed?
A seed with a normal root (radicle) at least as long as the seed itself, clearly on its way to a healthy seedling. A seed that only swells with water, or sprouts a root but never a shoot, does not count.
What germination percentage is acceptable?
Certified seed for most field crops is standardised between 70% and 90% depending on the crop — see the by-crop table above. Below that standard, raise the seed rate proportionally; below 50%, do not sow the lot at all.
Can I just sow extra seed instead of testing?
You can, but without a number you are guessing how much extra is enough. The calculator above converts your actual test result into the exact multiplier for your book seed rate, rather than an arbitrary top-up that may still be too little — or a waste if too much.
Does a low result mean the seed is fake or adulterated?
Usually not — low germination is most often age, poor storage (heat and moisture), or a naturally short-lived seed type, not adulteration. A germination test is a check on viability, not a fake-seed check on its own.
Should I test seed before or after treating it with fungicide?
Test an untreated sample first — treatment can mask a weak lot's true germination and complicates reading the result. Once you know the lot is worth sowing, [treat the seed](/seeds/seed-treatment) you actually intend to sow.
Can I retest if a result looks unexpectedly low?
Yes — draw a completely fresh 100-seed sample and repeat the test with careful attention to moisture and temperature before concluding the lot has failed. A single badly set-up test can understate a perfectly good lot.
Does the germination figure on a certified seed tag expire?
The tag records germination as tested on that date, not a permanent guarantee. Seed that then sat in ordinary storage for 9–12 months or more is worth retesting yourself before you rely on the printed figure.
Method, timing and standards follow general ICAR / state seed-certification-agency guidance, not a quote for any one state or lot — confirm with your local Krishi Vigyan Kendra before sowing. Read more at /editorial-policy.