
Soil Moisture Monitoring
A ₹500 tensiometer or a wireless capacitive probe replaces guesswork with an actual root-zone reading, so irrigation happens when the crop needs it — typically cutting 15–25% of water by skipping the irrigations the soil never actually needed.
- 15–25% Less Water
- ₹500–3,000 Basic Meter
- Payback in One Season
- No Licence Needed
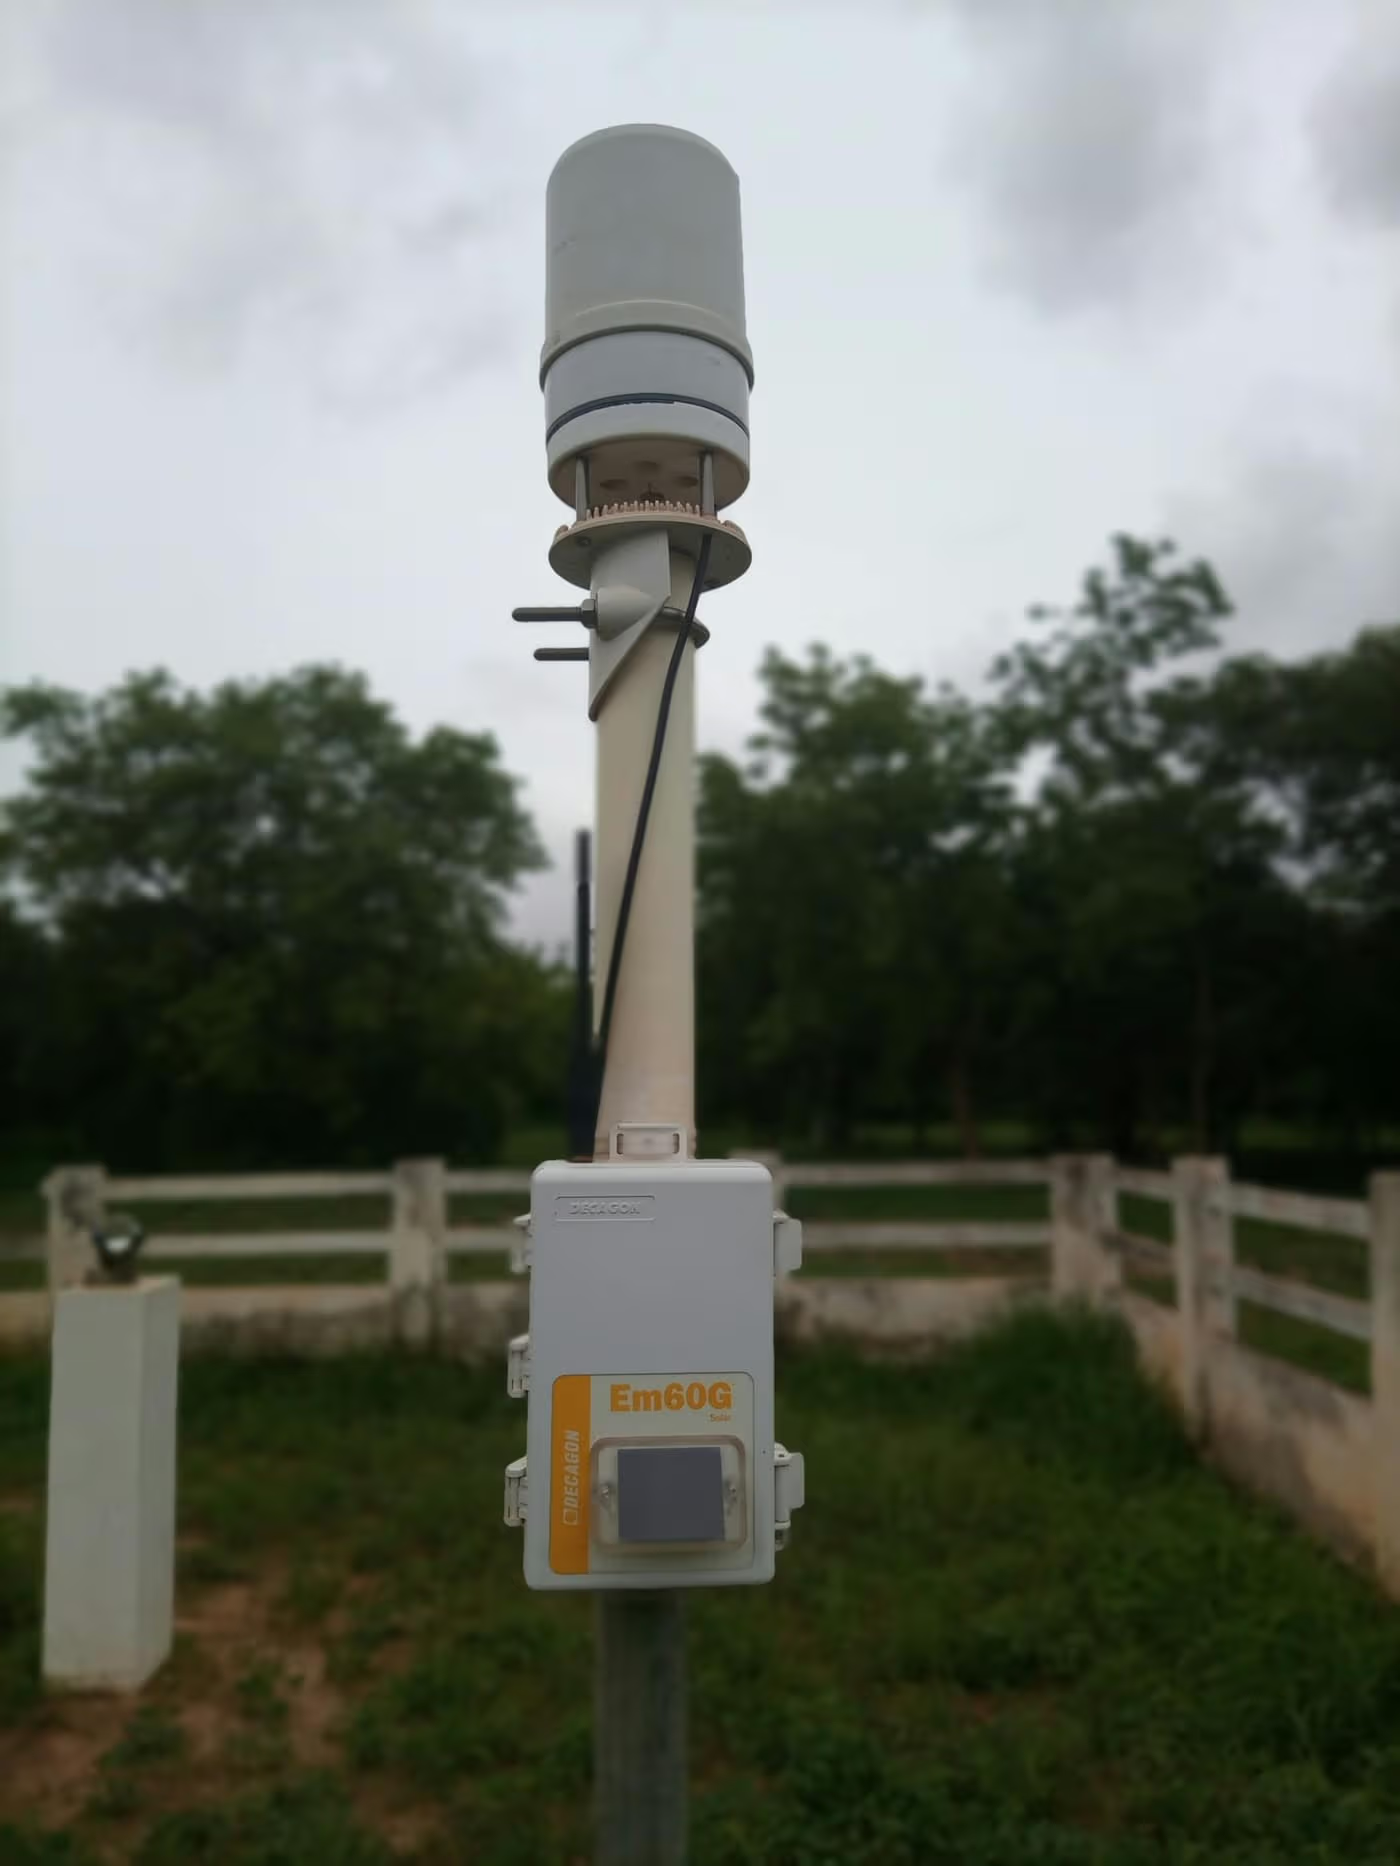
Most irrigation on Indian holdings still runs on a fixed calendar or a farmer’s memory of when the last watering was, not on what the root zone actually needs on any given day. Soil moisture monitoring closes that gap — a sensor buried at root depth gives an actual reading instead of a guess, and irrigation happens when the reading says the crop needs it, not on a schedule set at the start of the season. It is, cost for cost, one of the highest-return technologies on this site: a basic meter costs less than a day’s hired labour and typically pays for itself within one irrigation cycle.
This page sits alongside the Agri Technology hub, which places soil moisture monitoring against every other technology genuinely paying on an Indian holding, and the Irrigation hub, where it is one entry on a longer list of water-saving techniques. This page goes deeper on the one technology alone — every sensor type from a ₹500 mechanical gauge to a wireless app-connected kit, how to install and read one correctly, and how to turn that reading into an actual irrigation decision.
Soil moisture monitoring at a glance
The numbers a farmer checks before buying a meter or a sensor kit.
- Water Saving
- 15–25% by cutting irrigations that were not needed yet
- Basic Meter
- ₹500–3,000 for a tensiometer or resistance meter
- Smart Sensor Kit
- ₹3,000–25,000+ with app/telemetry
- Payback
- Within one irrigation season
- Licence
- None needed — no certification to buy, install or read one
- Best For
- Any farm still irrigating “by the calendar”
How soil moisture monitoring actually works
A reading from the root zone, not a guess from the surface or the calendar.
A soil moisture sensor is installed at the crop’s root depth and gives an actual reading of how much water is available to the plant right now, instead of a guess based on how many days it has been since the last irrigation. Depending on the sensor type, that reading is either a tension value in kilopascals — how hard the roots have to work to pull water out of the soil, on a tensiometer or resistance block — or a percentage volumetric water content, on a capacitive, FDR or TDR probe. Either number is compared against a threshold set for the crop and growth stage: below the threshold, irrigate; above it, wait.
The saving comes from the irrigations a fixed calendar schedules that the soil never actually needed — a field that got enough rain three days ago does not need Tuesday’s scheduled watering just because Tuesday is the scheduled day. See sensor types below for what actually goes into the ground, and reading & scheduling for how a reading becomes an irrigation decision rather than just a number on a dial.
Sensor types, from a ₹500 gauge to a wireless kit
Six ways to read soil moisture, in order of rising cost and rising automation.
Tensiometer
A water-filled tube with a vacuum gauge, buried to root depth. As the soil dries, it pulls water out of the tube and the gauge needle rises, reading soil tension directly — simple, no batteries, but needs periodic topping up with water and reads less reliably in very sandy or very dry soil.
Gypsum / resistance block
A small buried block whose electrical resistance changes with the surrounding soil moisture, read with a handheld meter carried from block to block. Cheap per block and needs no power in the ground, but the block itself degrades over two to three seasons, faster in saline or alkaline soil.
Capacitive / FDR probe
Measures the soil’s dielectric constant, which correlates closely to actual volumetric water content, often at several depths on a single rod. This is the sensor inside most wireless "smart" kits sold in India today — more consistent readings than a tensiometer, at a higher upfront cost.
TDR / TDT probe
Time-domain reflectometry, the most accurate and lab-grade of the common sensor types, used mainly on research stations, seed farms and large plantations rather than a typical smallholding — the accuracy rarely justifies the cost for a few acres.
Wireless IoT sensor + app
A capacitive probe paired with a solar- or battery-powered transmitter that pushes readings to a phone app over GSM or LoRa, letting one person check several plots without walking to any of them. Some kits go a step further and trigger the irrigation valve automatically once the reading crosses the set threshold.
Hand-feel and appearance method
Free, and the baseline every sensor above improves on: dig to root depth, squeeze a handful of soil into a ball — if it holds its shape, there is usually still enough moisture. Reliable only near the surface and inconsistent from one person to the next, which is exactly the guesswork a sensor removes.
Installing, reading and acting on it
Six steps from choosing a sensor to recalibrating it each season.
1. Choose the right sensor for the crop and budget
A single tensiometer or gypsum block is enough for one field checked occasionally; a wireless capacitive kit earns its higher cost once several plots need checking without a daily walk to each one.
Start with the ₹500–3,000 basic meter on one field for a season before spending on a smart kit — most of the water saving comes from checking any reading before irrigating, not from the sophistication of the sensor.
2. Install at the correct root depth
Shallow-rooted vegetables read best at 15–20 cm; deeper crops such as cotton or sugarcane need the sensor at 30–45 cm. Place it away from the field edge and clear of a drip line’s wetted bulb unless deliberately checking that zone.
A sensor placed too shallow reads how fast the surface is drying, not what the roots actually feel a foot below.
3. Establish the crop’s threshold
Set an irrigation trigger point for the crop and growth stage — paddy tolerates near-saturation, while cotton or groundnut is usually irrigated once roughly half the readily available water is depleted. Start with a general threshold and refine it over one or two seasons against how the crop actually performs.
4. Read consistently, at the same time of day
Take the reading in the morning before the day’s heat dries the surface, and track the trend over several days rather than acting on a single number that could be an outlier.
5. Irrigate on the reading, not the calendar
Only irrigate once the reading actually crosses the crop’s threshold; skip the scheduled watering if the soil is still holding enough moisture — this step is where the water saving actually happens.
6. Recalibrate and reposition every season
Move the sensor if a season’s readings never matched the crop’s visible condition — the original spot may not represent the field — and replace a gypsum block once it has visibly degraded, usually after two to three seasons.
Which crops benefit most
Water-sensitive and high-value crops earn back the cost of a sensor fastest.
Sugarcane
A long-duration, water-hungry crop where every unneeded irrigation across a full year adds up fastest.
Cotton
Sensitive to both waterlogging and moisture stress at flowering — a reading catches both mistakes a calendar cannot.
Potato
Shallow roots and a real yield penalty from both over- and under-watering during tuber bulking.
Wheat
A few critical irrigation stages where a reading confirms whether the crop actually needs that pass.
Paddy (Rice)
Alternate wetting and drying, guided by a simple tensiometer, is a proven water-saving practice on its own.
Tomato
Fruit cracking and blossom-end rot both trace back to inconsistent soil moisture — a reading keeps it steady.
Groundnut
A drought-tolerant crop that still loses yield to moisture stress at pegging — a reading catches the exact window.
Soybean
Closely sown and shallow-rooted, where a single misjudged irrigation affects the whole stand evenly.
Feel method vs basic meter vs smart sensor
The numbers that actually decide which one is worth buying.
The full technology-wide comparison, including drip irrigation and drone spraying, is on the Agri Technology hub. This table keeps to the three ways a farmer actually decides when to irrigate.
| Feature | Feel Method | Basic Meter | Smart / IoT Kit |
|---|---|---|---|
| What you get | A qualitative guess from digging and squeezing soil | A single number or dial reading at one depth | A number pushed to your phone, logged over time, at several depths |
| Cost | Free | ₹500–3,000 | ₹3,000–25,000+ per node |
| Accuracy | Low — inconsistent from one person to the next | Moderate — reliable at the one depth it is installed | Good — continuous, multi-depth readings |
| Effort per reading | Walk the field, dig, squeeze a handful | Walk to the sensor, read a gauge or dial | Check the phone — no field visit needed |
| Can trigger irrigation automatically | No | No — a manual reading only | Some kits, once linked to a motor or valve controller |
| Skill needed | None, but readings vary by person | Minimal — read a number against a threshold | Minimal — the app interprets the reading |
Cost vs saving — the real arithmetic
The cheapest technology on this site by cost-to-saving ratio, most of the time.
Cost for cost, this is one of the highest-return technologies on this site. Even the basic ₹500–3,000 meter typically pays for itself within a single irrigation cycle, simply by skipping the one or two waterings a season the soil never actually needed — at the cost of a single day’s hired labour or less.
A wireless smart kit costs more and earns that cost back differently: not primarily through a bigger water saving over the basic meter, but through the time saved managing several plots without walking to each one, and on a high-value crop where a missed dry-stress window has a real cost of its own.
- Basic meter cost₹500–3,000 for a tensiometer, resistance block or handheld meter — the honest starting point for any farm.
- Smart kit cost₹3,000–25,000+ per sensor node, depending on connectivity, depth channels and whether it can trigger a valve.
- Typical saving15–25% less irrigation water, mostly by cutting waterings the soil did not actually need yet.
- PaybackWithin one irrigation season for the basic meter; a smart kit pays back faster on a larger area or a high-value crop.
Where PMKSY subsidy does and does not apply
A sensor bought bundled into a drip system is subsidised very differently to one bought alone.
A sensor bought bundled into a drip or sprinkler system project is subsidised very differently to one bought alone. Under Per Drop More Crop (PDMC), soil moisture sensors and irrigation automation are eligible as part of the total project cost of a micro-irrigation system, sharing the same subsidy rate as the system itself — see the full PDMC scheme page and the Drip Irrigation portal for the exact rates.
Bought on its own, a basic ₹500–3,000 meter is rarely subsidised anywhere — it is cheap enough that most farmers simply buy it outright rather than filing for support. A handful of state programmes fund standalone smart-sensor kits for FPOs or Custom Hiring Centres under precision-farming pilots, but this is project-based and state-specific, not a guaranteed nationwide route — check with the state agriculture department before assuming eligibility.
- PMKSY routeSensors and automation are eligible when bundled inside a drip or sprinkler project — subsidised at the same 55%/45% rate as the irrigation system itself.
- Standalone purchaseUsually unsubsidised — a basic meter is cheap enough that buying it outright is simpler than applying for support.
- State pilotsSome states fund standalone smart-sensor kits for FPOs and Custom Hiring Centres under precision-farming programmes, project by project.
- For most farmersThe practical route is to buy the ₹500–3,000 basic meter outright, and pursue subsidy only when it is bundled into a full drip or sprinkler system application.
- No standalone schemeThere is no dedicated national scheme funding a soil moisture sensor bought by itself — always confirm current terms with the state department before applying.
Common soil moisture monitoring problems
Four problems that quietly make a reading useless without the sensor itself failing.
Reading does not match the crop’s visible condition
- Symptoms
- The meter reads "wet" while the crop still shows moisture stress, or vice versa.
- Causes
- The sensor installed too shallow or too deep for the crop’s actual root zone, or one sensor covering a field with uneven soil texture.
- Solutions
- Install at the depth matching the crop’s main root zone and, on a field with visibly different soil types, use more than one sensor rather than one reading for the whole area.
Gypsum block gives an inconsistent reading over time
- Symptoms
- The same soil condition gives a noticeably different reading season to season.
- Causes
- The block itself degrading, faster in saline or alkaline soil, typically after two to three seasons of use.
- Solutions
- Replace the block on a two-to-three-season cycle rather than waiting for a visibly wrong reading to notice it has failed.
Wireless sensor loses connectivity or the battery dies
- Symptoms
- The app stops updating, or shows a stale reading from several days ago.
- Causes
- Weak GSM or LoRa signal at the sensor’s field location, or a solar panel too shaded or dusty to keep the battery topped up.
- Solutions
- Check signal strength before choosing the install spot, and clean the solar panel regularly if the kit relies on one.
Sensor reads wet right after irrigation but the crop still wilts
- Symptoms
- A good reading straight after watering, followed by visible crop stress before the next scheduled check.
- Causes
- On drip irrigation, the sensor sits outside the actual wetted bulb around the emitter, so it reads a moist pocket the roots cannot fully reach.
- Solutions
- Place the sensor inside the wetted bulb, close to but not touching the emitter, so the reading reflects what the root zone is actually receiving.
Mistakes to avoid
The buying and installing mistakes that waste the saving a sensor should deliver.
Buying a smart IoT kit before trying a basic meter
Most of the water saving comes from checking any reading before irrigating, not from the sophistication of the sensor — a season with the ₹500–3,000 meter shows whether the ongoing cost of a smart kit is actually worth it for the farm.
Installing the sensor too shallow
A shallow sensor reads how fast the surface is drying, not what the roots a foot below actually feel — the single most common reason a reading stops matching the crop’s real condition.
Using one sensor for a large, unevenly textured field
A sandy corner and a clay corner of the same field never hold water the same way — one reading representing the whole field is close to the guesswork it was meant to replace.
Never setting a crop-specific threshold
The same trigger number used for every crop and growth stage is only marginally better than the fixed calendar it replaced — the reading only helps once it is compared against a number that means something for that crop.
Leaving a tensiometer or gypsum block unmaintained for years
A tensiometer needs periodic water top-ups and a gypsum block degrades after two to three seasons — an unmaintained sensor quietly starts giving a wrong reading long before it visibly fails.
Reading the sensor and irrigating on the calendar anyway
A sensor only saves water on the irrigations that actually get skipped because of it — out of habit, irrigating on schedule regardless of the reading gets none of the saving despite the cost already spent.
Related tools
Compare, check the weather and run the numbers alongside a sensor reading.
- Technique Comparison ToolSee soil moisture monitoring side by side against any other farming technique on cost, labour and suitability.
- Weather DashboardCheck recent and forecast rainfall alongside a sensor reading before deciding whether to irrigate.
- Crop Profit CalculatorSee where the cost of a meter or sensor kit sits against the water and labour it saves over a season.
The complete guide to soil moisture monitoring
Sensor types, installation, thresholds and the economics — everything above, in reading order.
What is soil moisture monitoring, and why farmers are adopting it
Soil moisture monitoring replaces a guess with an actual reading from the crop’s root zone, so irrigation happens because the soil needs it, not because a fixed calendar says Tuesday is watering day. A sensor buried at root depth reports either soil tension — how hard the roots must work to pull out the remaining water — or volumetric water content, and that number is compared against a threshold set for the crop.
Adoption has grown because the cost of entry is so low: a basic tensiometer or resistance meter costs ₹500–3,000, less than a single day of hired labour, and typically pays for itself within one irrigation cycle by skipping just one or two waterings the soil never actually needed. Few technologies on this site return their cost that fast.
The sensor types explained
Six ways exist to read soil moisture, in roughly rising order of cost and automation: the free hand-feel method, a mechanical tensiometer, a gypsum or resistance block, a capacitive or FDR probe, a lab-grade TDR probe, and a wireless IoT kit that pushes a capacitive probe’s readings to a phone app — see the sensor types section above for what each one actually measures and costs.
Most farmers start at one end of that list and move up only if the reading genuinely does not keep pace with how they farm — a single tensiometer is enough for one field checked occasionally, while a wireless kit earns its cost once several plots need checking without a daily walk to each one.
Choosing the right sensor for your farm and budget
The honest recommendation for almost every farm is to start with the ₹500–3,000 basic meter for a season before spending more. Most of the water saving comes from the habit of checking any reading before irrigating, not from the sophistication of the sensor itself — a season with the basic meter shows plainly whether the ongoing cost of a smart kit would actually be worth it.
A wireless kit earns its higher cost on a larger area managed by one person, on a high-value crop where a missed dry-stress window has a real cost, or where several plots need checking without a daily field visit to each.
Installing and reading a sensor correctly
The reading & scheduling timeline above walks through six steps: choosing the sensor, installing at the correct root depth, setting a crop-specific threshold, reading consistently at the same time of day, irrigating on the reading rather than the calendar, and recalibrating each season.
Depth is the single most common source of a wrong reading — a sensor placed too shallow reports how fast the surface is drying, not what the roots a foot below actually feel, and on drip irrigation, a sensor sitting outside the emitter’s wetted bulb reads a moist pocket the roots cannot fully reach.
Turning a reading into an irrigation decision
A reading alone changes nothing — the saving happens only once a scheduled irrigation actually gets skipped because the reading says the soil does not need it yet. That requires a threshold specific to the crop and growth stage: paddy tolerates near-saturation under alternate wetting and drying, while cotton or groundnut is usually irrigated once roughly half the readily available water is depleted.
Start with a general threshold for the crop and refine it over one or two seasons against how the crop actually performs — the economics section above sets out why even a rough threshold, applied consistently, pays back the meter’s cost within a single season.
Which crops benefit most
Long-duration, water-hungry crops like sugarcane, crops sensitive to both over- and under-watering like cotton and potato, and crops where inconsistent moisture directly costs yield or quality like tomato earn back a sensor’s cost fastest — see the suited crops grid above for the full list including paddy under alternate wetting and drying.
It is a weaker fit where a single irrigation event covers the whole crop cycle, or on a very small, uniformly textured plot where the hand-feel method already gives a reasonably consistent answer.
Cost vs saving — the real economics
The economics section above sets the arithmetic out plainly: a ₹500–3,000 basic meter typically pays back within one irrigation season, and a 15–25% water saving compounds across every irrigation for the life of the crop or the sensor, whichever is shorter.
A wireless smart kit costs more and earns that back differently — mainly through the time saved managing several plots remotely, and on a high-value crop where a missed dry-stress window has a cost of its own beyond the water saved.
PDMC subsidy and where it does and does not apply
The subsidy section above explains the distinction that matters most: a sensor bundled into a drip or sprinkler system’s total project cost is subsidised under Per Drop More Crop (PDMC) at the same rate as the irrigation system itself — see the full PDMC scheme page.
A sensor bought standalone is rarely subsidised anywhere, and is cheap enough that most farmers simply buy it outright. A handful of state precision-farming pilots fund standalone kits for FPOs and Custom Hiring Centres, but this is project-based, not a guaranteed route — confirm current terms with the state agriculture department before applying.
Common mistakes and how to avoid them
Beyond the mistakes listed above, the pattern underneath most of them is buying more sensor than the farm needs before testing whether a basic meter already changes irrigation decisions for the better, or installing correctly-bought equipment without the depth, threshold and maintenance that make its reading trustworthy.
The quieter mistake is buying a sensor and then irrigating on the calendar out of habit anyway — the saving only happens on the irrigations that actually get skipped because of what the sensor reports.
Is soil moisture monitoring right for your field?
As a general rule: any farm still irrigating strictly by the calendar, on a crop where over- or under-watering has a real cost, is the clearest case for starting with the ₹500–3,000 basic meter — the Technique Comparison Tool sets it side by side against every other technique this site profiles, on cost, labour and the farm size it suits.
Where a single field is small, uniform and already checked by hand before every irrigation, the free hand-feel method may already be doing most of the job — a sensor adds the most value once that manual check becomes inconsistent, occasional, or spread across more land than one person can walk daily.
Frequently asked questions
What is soil moisture monitoring?
Soil moisture monitoring uses a sensor — from a ₹500 mechanical tensiometer to a wireless capacitive probe — installed at the crop’s root depth to give an actual reading of how much water is available to the plant, instead of guessing based on the calendar or the last time it rained.
How much does a soil moisture sensor cost in India?
A basic tensiometer, gypsum block or handheld resistance meter costs ₹500–3,000. A wireless smart sensor with an app and telemetry costs ₹3,000–25,000 or more per sensor node, depending on connectivity and whether it can trigger a valve automatically.
How much water can soil moisture monitoring actually save?
Typically 15–25% less irrigation water, mostly by cutting the waterings a fixed calendar scheduled that the soil never actually needed yet — the same figure this site’s Irrigation hub uses for the technique.
What is the difference between a tensiometer and a capacitive sensor?
A tensiometer is a mechanical, water-filled tube that reads soil tension directly on a vacuum gauge — simple and cheap, but needs periodic water top-ups. A capacitive or FDR probe measures the soil’s dielectric constant electronically, giving a more consistent volumetric-water-content reading, often at several depths, and is the sensor most wireless smart kits are built around.
Do I need a licence or training to use a soil moisture sensor?
No — unlike a drone or a certain class of farm machinery, there is no licence, registration or mandatory training to buy, install or read a soil moisture sensor of any kind.
Is there a government subsidy for soil moisture sensors?
Only indirectly for most farmers: PMKSY’s Per Drop More Crop component subsidises a sensor when it is bundled into a drip or sprinkler system’s total project cost, at the same rate as the irrigation system. A sensor bought on its own is rarely subsidised, though some states fund standalone kits for FPOs or Custom Hiring Centres under precision-farming pilots.
How deep should I install a soil moisture sensor?
To match the crop’s main root zone — roughly 15–20 cm for shallow-rooted vegetables, and 30–45 cm for deeper-rooted crops such as cotton or sugarcane. A sensor placed too shallow reads how fast the surface is drying, not what the roots actually feel.
Which crops benefit most from soil moisture monitoring?
Long-duration, water-hungry crops like sugarcane, crops sensitive to both over- and under-watering like cotton and potato, and crops where inconsistent moisture costs yield or quality directly, like tomato, earn back the sensor’s cost fastest — paddy also benefits under an alternate-wetting-and-drying schedule.
Can a soil moisture sensor automatically turn on my irrigation?
Some wireless smart kits can, once linked to a motor or valve controller — the sensor triggers irrigation automatically when the reading crosses the set threshold. A basic tensiometer or gypsum block only gives a manual reading; the farmer still decides and switches the irrigation on.
Is the hand-feel method good enough, or do I actually need a sensor?
The hand-feel method — digging to root depth and squeezing a handful of soil — is free and a reasonable check near the surface, but it is inconsistent from one person to the next and unreliable deeper down. A ₹500 basic meter removes that inconsistency at a cost most farms recover within one irrigation season.
Cost, saving and subsidy figures follow general industry estimates and the PMKSY scheme documents, not a quote for any one sensor brand or state — confirm before buying. Read more at /editorial-policy.